This manual provides essential guidelines for installing James Hardie products, ensuring durability and compliance with industry standards․ It is designed for contractors, architects, and DIY enthusiasts, offering step-by-step instructions, safety tips, and best practices to achieve professional results․ The document covers various product lines, including HardiePlank and HardiePanel, emphasizing proper techniques for different applications․ By following this guide, users can ensure their projects meet both functional and aesthetic expectations while adhering to local building codes and manufacturer recommendations․
1․1 Overview of Hardie Products and Their Applications
James Hardie offers a range of durable, low-maintenance fiber cement products, including HardiePlank lap siding, HardiePanel vertical siding, and HardieShingle siding․ These products are designed for exterior cladding, providing resistance to weather, pests, and fire․ Ideal for various architectural styles, they are suitable for residential and commercial projects, offering a long-lasting, sustainable solution for facades and walls in diverse climates․
1․2 Importance of Proper Installation Techniques
Proper installation techniques are crucial for ensuring the durability and performance of Hardie products․ Correct methods prevent water infiltration, structural damage, and premature wear․ Adhering to manufacturer guidelines ensures compliance with building codes and warranties, while improper installation can lead to costly repairs and safety hazards․ This section emphasizes the necessity of following specified procedures to achieve optimal results and maintain product integrity․
Pre-Installation Requirements
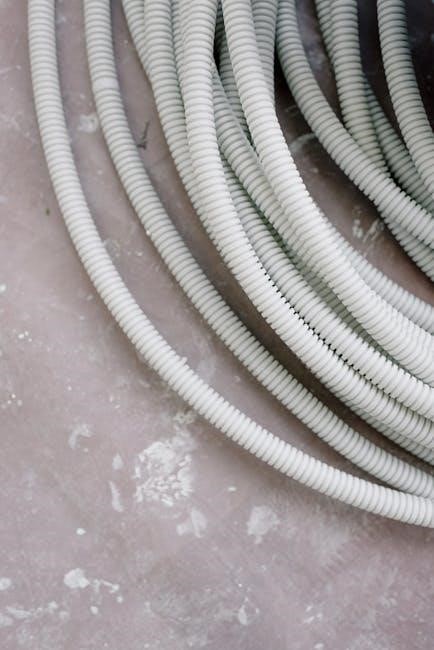
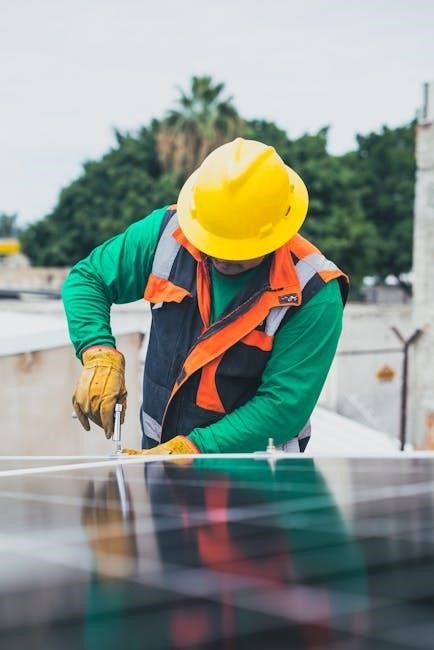
Ensure proper site preparation, including a clean, dry work area and necessary tools․ Verify all materials are undamaged and stored correctly․ Check local building codes and ensure a water-resistive barrier is installed according to AS/NZS standards․ Confirm compatibility of fasteners and materials with climate conditions to prevent corrosion and ensure longevity․
2․1 Site Preparation and Tools Needed
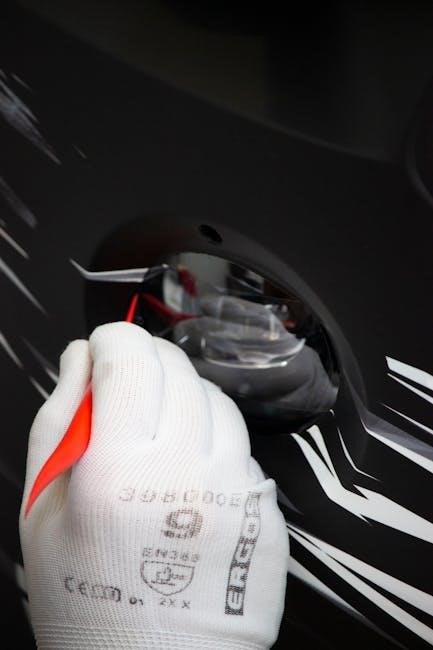
Proper site preparation involves clearing the area of debris and ensuring a clean, dry workspace․ Essential tools include circular saws with HardieBlade, drills, and utility knives․ Storage areas must protect materials from moisture and damage․ Verify stud spacing and sheathing integrity; Ensure all fasteners and materials comply with climate conditions to prevent corrosion․ Adhere to safety guidelines for handling fibre-cement products․
2․2 Handling and Storage of Hardie Products
Proper handling involves lifting panels from the center to avoid damage․ Store products flat on pallets in a dry, shaded area, protected from moisture and extreme weather․ Avoid stacking materials directly on the ground․ Ensure all packages are securely wrapped and free from deformation․ Inspect for damage before use and avoid exposure to prolonged humidity to maintain product integrity and performance․
Installing HardiePlank Lap Siding
This section outlines the step-by-step process for installing HardiePlank Lap Siding, including surface preparation, flashing installation, and proper fastening techniques․ Ensure compliance with manufacturer guidelines and local building codes for a durable and weather-tight finish․
3․1 Step-by-Step Installation Process
3․2 Maintaining Proper Clearances and Flashing Details
Maintaining proper clearances and flashing details is crucial for preventing water infiltration․ Ensure a 1/4″ gap between the bottom of Hardie products and horizontal flashing, avoiding caulk․ Install kickout flashing at roof-to-wall transitions to divert water․ Use a water-resistive barrier behind siding and ensure all joints and penetrations are properly sealed․ Flashing must extend at least 4″ below the siding course for effective moisture protection․
- Maintain 1/4″ clearance between siding and flashing․
- Do not caulk gaps to ensure proper water drainage․
- Install kickout flashing to divert water away from walls․

HardiePanel Vertical Siding Installation
HardiePanel Vertical Siding Installation offers a sleek, modern look and is designed for easy installation on wood studs or OSB sheathing․ Follow guidelines for secure fastening and alignment to ensure structural integrity and visual appeal․
4․1 Fastening Requirements and Spacing
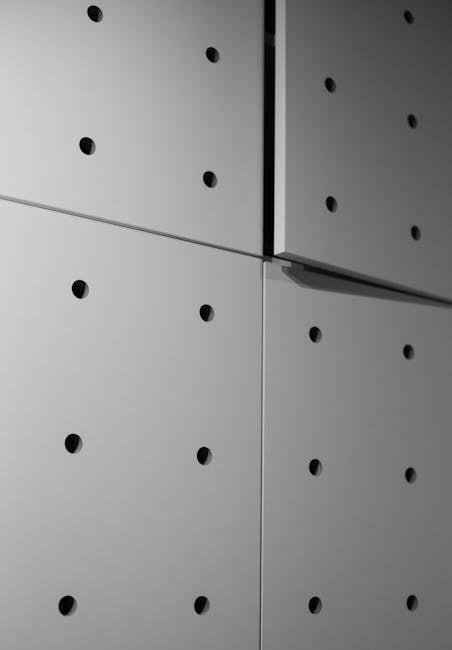
HardiePanel Vertical Siding requires specific fastening to ensure stability and weather resistance․ Use hot-dipped galvanized nails or approved fasteners, spaced 16 inches on center for wood studs․ For OSB sheathing, maintain a minimum of 7/16-inch thickness․ Fasteners must penetrate studs by at least 1․5 inches․ Ensure proper alignment and spacing to prevent warping or damage․ Refer to the HardiePanel Technical Data Sheet for detailed specifications and compliance with local building codes․
4․2 Special Considerations for Vertical Orientation
When installing HardiePanel vertically, ensure panels are plumb and level before fastening․ Seal all joints and edges to prevent water infiltration․ Flashing must be installed at all openings and transitions to maintain weather tightness․ Verify alignment with studs to secure panels properly․ Avoid over-tightening fasteners to prevent damage․ Regularly inspect for plumb and level to ensure structural integrity and aesthetic appeal․ Follow manufacturer guidelines for optimal results․ Always check local building codes for compliance․ Proper sealing and alignment are critical for durability․ Ensure all edges are securely fastened and sealed․ Maintain even spacing between panels for a uniform appearance․ Use recommended fasteners to avoid corrosion and ensure long-term performance․ Consult technical specifications for specific requirements․ Address any irregularities in the substrate before installation to ensure a smooth finish․ Use a level to verify alignment and plumbness throughout the process․ Ensure panels are securely attached to studs to withstand wind loads․ Inspect all flashing details for proper sealing and alignment․ Follow all safety precautions when working at heights․ Use appropriate ladder stabilizers and safety harnesses; Ensure proper ventilation behind panels to prevent moisture buildup․ Check for any manufacturer updates or revisions to installation guidelines․ Use a spirit level to confirm the accuracy of installations․ Verify that all fasteners are correctly spaced and tightened․ Ensure panels are properly aligned with surrounding surfaces for a seamless integration․ Address any gaps or misalignments promptly to avoid structural issues․ Use a chalk line to mark studs and ensure accurate placement․ Double-check all measurements before securing panels․ Ensure panels are clean and dry before installation to prevent staining․ Use a rubber mallet to tap panels into place gently․ Avoid using excessive force, which may damage the panels․ Ensure all tools are in good condition to prevent damage to the panels․ Use a utility knife or saw with a HardieBlade for clean cuts․ Sand cut edges to smooth them and prevent rough surfaces․ Apply a suitable sealant to all joints and edges as recommended․ Ensure all fasteners are corrosion-resistant and suitable for outdoor use․ Check the substrate for any defects or unevenness before installation․ Use shims if necessary to level the panels․ Ensure the substrate is dry and free of debris for proper adhesion․ Follow all manufacturer recommendations for sealants and flashing materials․ Inspect all panels for damage before installation and replace any damaged ones․ Use a laser level for precise alignment in large installations․ Ensure all panels are securely fastened to withstand environmental conditions․ Regularly inspect the installation for any signs of damage or wear․ Address any issues promptly to maintain the integrity of the siding․ Use a putty knife to apply sealant evenly and smoothly․ Wipe away any excess sealant immediately․ Ensure all flashing details are compatible with the siding material․ Follow local building codes and regulations for vertical installations․ Use a drill with appropriate bits for pre-drilling holes in studs․ Ensure all fasteners are seated properly without over-tightening․ Use a stud finder to locate studs accurately․ Mark the stud locations clearly for precise fastening․ Ensure panels are evenly spaced and aligned for a professional finish․ Use a measuring tape to verify spacing and alignment․ Double-check all measurements for accuracy․ Ensure all panels are securely fastened before moving on to the next section․ Use a level to verify the panels are plumb and level․ Address any deviations immediately․ Ensure all edges are properly sealed to prevent water infiltration․ Use a caulk gun to apply sealant neatly․ Smooth out any bubbles or unevenness in the sealant․ Ensure all joints are tight and even for a seamless appearance․ Follow all safety guidelines when handling tools and materials․ Use protective gear such as gloves and safety glasses․ Ensure the work area is clean and clear of debris․ Use a ladder stabilizer for added safety when working at heights․ Ensure all fasteners are tightened evenly to avoid warping the panels․ Use a torque wrench if necessary to maintain consistent tightness․ Check the manufacturer’s torque specifications for fasteners․ Ensure all panels are properly aligned with each other for a uniform look․ Use a chalk line to mark the installation path accurately․ Verify the alignment of each panel before securing it․ Use a spirit level to ensure the panels are plumb and level․ Address any misalignment issues promptly to avoid costly repairs․ Ensure all fasteners are corrosion-resistant and suitable for the local climate․ Use stainless steel fasteners in coastal or high-humidity areas․ Follow all manufacturer recommendations for fastener type and spacing․ Ensure panels are installed in accordance with local building codes․ Use a drill bit that is compatible with the fastener type․ Pre-drill holes in studs to avoid splitting the wood․ Ensure all fasteners are seated properly without over-tightening․ Use a rubber mallet to tap panels into place gently․ Avoid using hammers that may damage the panels․ Ensure all edges are properly sealed to prevent water infiltration․ Use a putty knife to apply sealant evenly and smoothly․ Wipe away any excess sealant immediately․ Ensure all flashing details are compatible with the siding material․ Follow local building codes and regulations for vertical installations․ Use a ladder stabilizer for added safety when working at heights․ Ensure all fasteners are securely attached to studs․ Use a stud finder to locate studs accurately․ Mark the stud locations clearly for precise fastening․ Ensure panels are evenly spaced and aligned for a professional finish․ Use a measuring tape to verify spacing and alignment․ Double-check all measurements for accuracy․ Ensure all panels are securely fastened before moving on to the next section․ Use a level to verify the panels are plumb and level․ Address any deviations immediately․ Ensure all edges are properly sealed to prevent water infiltration․ Use a caulk gun to apply sealant neatly․ Smooth out any bubbles or unevenness in the sealant․ Ensure all joints are tight and even for a seamless appearance․ Follow all safety guidelines when handling tools and materials․ Use protective gear such as gloves and safety glasses․ Ensure the work area is clean and clear of debris․ Use a ladder stabilizer for added safety when working at heights․ Ensure all fasteners are tightened evenly to avoid warping the panels․ Use a torque wrench if necessary to maintain consistent tightness․ Check the manufacturer’s torque specifications for fasteners․ Ensure all panels are properly aligned with each other for a uniform look․ Use a chalk line to mark the installation path accurately․ Verify the alignment of each panel before securing it․ Use a spirit level to ensure the panels are plumb and level․ Address any misalignment issues promptly to avoid costly repairs․ Ensure all fasteners are corrosion-resistant and suitable for the local climate․ Use stainless steel fasteners in coastal or high-humidity areas․ Follow all manufacturer recommendations for fastener type and spacing․ Ensure panels are installed in accordance with local building codes․ Use a drill bit that is compatible with the fastener type․ Pre-drill holes in studs to avoid splitting the wood․ Ensure all fasteners are seated properly without over-tightening․ Use a rubber mallet to tap panels into place gently․ Avoid using hammers that may damage the panels․ Ensure all edges are properly sealed to prevent water infiltration․ Use a putty knife to apply sealant evenly and smoothly․ Wipe away any excess sealant immediately․ Ensure all flashing details are compatible with the siding material․ Follow local building codes and regulations for vertical installations․ Use a ladder stabilizer for added safety when working at heights․ Ensure all fasteners are securely attached to studs․ Use a stud finder to locate studs accurately․ Mark the stud locations clearly for precise fastening․ Ensure panels are evenly spaced and aligned for a professional finish․ Use a measuring tape to verify spacing and alignment․ Double-check all measurements for accuracy․ Ensure all panels are securely fastened before moving on to the next section․ Use a level to verify the panels are plumb and level․ Address any deviations immediately․ Ensure all edges are properly sealed to prevent water infiltration․ Use a caulk gun to apply sealant neatly․ Smooth out any bubbles or unevenness in the sealant․ Ensure all joints are tight and even for a seamless appearance․ Follow all safety guidelines when handling tools and materials․ Use protective gear such as gloves and safety glasses․ Ensure the work area is clean and clear of debris․ Use a ladder stabilizer for added safety when working at heights․ Ensure all fasteners are tightened evenly to avoid warping the panels․ Use a torque wrench if necessary to maintain consistent tightness․ Check the manufacturer’s torque specifications for fasteners․ Ensure all panels are properly aligned with each other for a uniform look․ Use a chalk line to mark the installation path accurately․ Verify the alignment of each panel before securing it․ Use a spirit level to ensure the panels are plumb and level․ Address any misalignment issues promptly to avoid
Tools and Materials for Hardie Installation
Essential tools include circular saws with HardieBlade, drills, shears, utility knives, chalk lines, and levels․ Use galvanized or stainless steel fasteners for durability․ Apply weather-resistive barriers and flashing for moisture protection․
5․1 Recommended Cutting Tools and Accessories
For precise cuts, use a circular saw equipped with a HardieBlade or a diamond-tipped blade․ Manual, pneumatic, or electric shears are also effective․ Utility knives can be used for smaller cuts․ Always maintain sharp tools to prevent damage․ A vacuum dust collection system with a circular saw minimizes dust and ensures clean cuts․ Proper cutting tools enhance accuracy and preserve the product’s finish quality․
5․2 Fasteners and Their Corrosion Resistance
James Hardie recommends using high-quality, hot-dipped galvanized nails for optimal durability․ Stainless steel fasteners are advised for coastal or high-humidity areas to prevent premature corrosion․ Ensure fasteners are compatible with local environmental conditions․ Avoid using low-grade materials, as they may compromise product integrity․ Proper fastening ensures structural stability and long-lasting performance of Hardie products, adhering to industry standards and manufacturer guidelines․
Weather-Resistive Barriers and Flashing
Install a water-resistive barrier like HardieWrap to prevent moisture infiltration․ Ensure proper flashing around windows, doors, and joints․ Adhere to AS/NZS standards for optimal weather protection and durability․
Accessing Technical Support and Resources
6․1 Importance of Water-Resistive Barriers
A water-resistive barrier is crucial to prevent moisture infiltration behind Hardie products․ It protects the wall cavity from water damage, ensuring structural integrity and reducing mold risks․ HardieWrap or equivalent Class 4 vapor-permeable barriers are recommended․ Proper installation adheres to AS/NZS 4200․2 standards, ensuring compliance and long-term durability of the exterior cladding system․