This manual provides detailed instructions for installing the Honeywell VisionPro 8000 thermostat, ensuring proper setup and functionality. It is designed for professional installers and technicians, covering essential steps, safety guidelines, and system compatibility to guarantee efficient operation. The guide includes troubleshooting tips and configuration options, making it a comprehensive resource for successful installation and maintenance.
1.1 Overview of the Honeywell VisionPro 8000 Thermostat
The Honeywell VisionPro 8000 is a high-efficiency thermostat designed for precise temperature control. It features a user-friendly touchscreen interface, compatibility with various HVAC systems, and advanced functionalities like remote sensors and Wi-Fi connectivity. Suitable for both residential and commercial settings, it offers flexible installation options and customizable settings to optimize heating and cooling performance, ensuring energy efficiency and comfort.
1.2 Importance of Following the Installation Manual
Adhering to the Honeywell VisionPro 8000 installation manual ensures correct setup, preventing system malfunctions and safety hazards. Proper installation maintains warranty validity, optimizes energy efficiency, and guarantees compliance with local building codes. Deviating from instructions can lead to equipment damage or unsafe conditions, emphasizing the necessity of following guidelines meticulously for reliable and efficient thermostat operation.

System Requirements and Compatibility
The Honeywell VisionPro 8000 is compatible with standard HVAC systems, requiring 24V AC power and specific terminal connections for proper functionality in both residential and commercial settings.
2.1 Compatible Systems and Equipment
The Honeywell VisionPro 8000 thermostat is compatible with conventional HVAC systems, heat pumps, and dual fuel setups. It operates efficiently in both residential and commercial environments, supporting up to four stages of heating and two stages of cooling. The system integrates with remote sensors for precise temperature control and is adaptable for humidity management. It is also compatible with two-transformer systems, ensuring flexibility in various applications.
2.2 Technical Specifications for Installation
The Honeywell VisionPro 8000 requires a 24VAC power supply and is compatible with 2- or 4-wire systems. It operates within a temperature range of 32°F to 122°F (0°C to 50°C). The thermostat supports up to four stages of heating and two stages of cooling. Wiring connections include R, C, W, Y, and G terminals. It is suitable for dual-transformer systems with an optional jumper removal. Ensure compliance with local electrical codes during installation.
Pre-Installation Steps
Disconnect power before starting. Read instructions carefully to avoid damage or hazards. Ensure a trained installer performs the setup to guarantee compliance with safety standards and proper functionality.
3.1 Gathering Necessary Tools and Materials
To begin, gather essential tools: screwdrivers (Phillips and flathead), wire strippers, pliers, voltage tester, and a drill. Ensure materials like mounting screws, wall anchors, and wiring connectors are available. Verify compatibility of all components with the Honeywell VisionPro 8000 thermostat to avoid installation errors. Proper preparation ensures a smooth and efficient setup process.
3.2 Understanding Safety Precautions
Always disconnect power before starting installation to prevent electrical shock. Wear protective gear like gloves and safety glasses. Follow local electrical codes and manufacturer guidelines. Avoid damaging wires or components during handling. Ensure proper grounding of the system to prevent hazards. Keep the area clear of debris and flammable materials. Adhere to all safety warnings provided in the manual to guarantee a secure installation process.

Thermostat Installation Process
Mount the thermostat securely on the wall, ensuring level placement. Connect wires carefully to the appropriate terminals, following the manual’s wiring diagram. Configure installer settings like system type and operation mode. Finally, test the thermostat to ensure proper functionality and system response before completing the installation process.
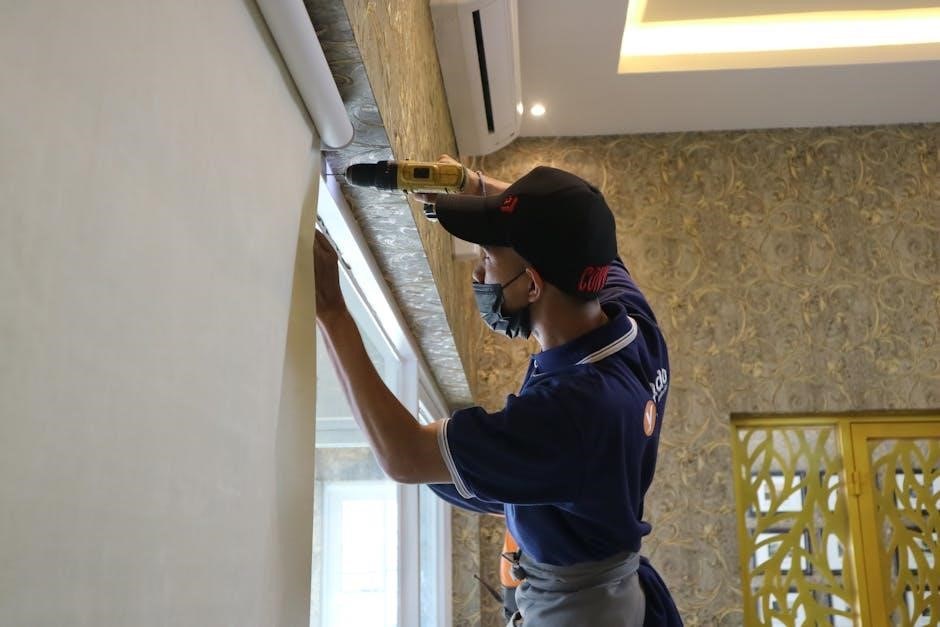
4.1 Mounting the Thermostat
Begin by locating a suitable wall surface, ensuring it is level and free from direct sunlight or drafts. Use the provided mounting hardware to secure the thermostat base to the wall. Ensure the base is tightly fastened and aligned properly. If necessary, drill pilot holes for screws to avoid damaging the wall. Once mounted, confirm the thermostat is stable and evenly positioned before proceeding with wiring connections.
4.2 Connecting Wires to the Thermostat
First, ensure the power to the heating and cooling system is turned off. Identify the terminal letters on the old thermostat and match them to the corresponding terminals on the Honeywell VisionPro 8000. Connect the wires securely to the appropriate terminals, such as R (heating power), W/Y (heat/cool), G (fan), and C (common). For systems with two transformers, remove the factory-installed jumper. Tighten all connections firmly to avoid loose wires, which could cause malfunctions. After wiring, restore power and test the thermostat to ensure proper operation. If issues arise, check connections and consult the manual or a professional for assistance.
Wiring and Electrical Connections
Identify terminal letters (R, W/Y, G, C) and connect wires securely. Ensure proper connections to avoid power issues and system malfunctions. Follow manual guidelines carefully.
5.1 Identifying Terminal Letters and Their Functions
Terminal letters like R (heating power), W/Y (heating or cooling stage), G (fan), and C (common) must be identified. Each terminal serves a specific function in the system. Proper identification ensures correct wiring connections, preventing malfunctions. Refer to the manual or diagrams for precise terminal assignments and their roles in the thermostat’s operation. Accurate wiring is crucial for safe and efficient system performance.
5.2 Connecting to the Heating and Cooling System
Connect wires to the appropriate terminals for heating (W/Y) and cooling (Y) systems. Ensure connections match the HVAC system type. For multi-stage systems, use designated terminals. Verify compatibility with two-transformer systems by removing factory-installed jumpers if necessary. Proper connections ensure efficient system operation. Always disconnect power before starting connections to avoid damage or safety hazards. Follow manual guidelines for precise setup.
Installer Setup and Configuration
Select Residential or Commercial mode during setup to ensure proper functionality. Follow on-screen instructions for advanced configurations, ensuring compliance with building codes and system requirements.
6.1 Selecting Residential or Commercial Mode
Selecting Residential or Commercial mode during installer setup ensures proper system operation. Residential mode is designed for home use, while Commercial mode meets building codes and-specific requirements. Choose the appropriate mode to customize settings, such as temperature ranges and operation parameters. This step ensures compliance with safety standards and optimizes performance for the intended application. Proper selection is crucial for system functionality and user satisfaction.
6.2 Configuring Advanced Settings
After selecting the mode, configure advanced settings like temperature limits, fan operation, and humidity control. Ensure the system changeover is correctly set and wire the A-L/A terminal to the economizer. Enable remote sensor options if needed. Adjust settings to meet building codes and safety regulations. Refer to the index for specific instructions and verify each setting for optimal performance and compliance.
Post-Installation Testing and Verification
After installation, test the thermostat’s operation by checking heating and cooling system functionality. Verify temperature settings, fan operation, and humidity control. Ensure all configurations meet building codes and safety standards. Refer to the index for detailed testing procedures to confirm proper system performance and user satisfaction.
7.1 Checking Thermostat Operation
After installation, verify the thermostat’s basic functionality by ensuring it accurately reads and displays temperature. Test the heating and cooling systems by setting different temperatures and confirming the system responds correctly. Check the fan operation, humidity control, and any additional features like remote sensors. Ensure all settings align with the installation manual’s guidelines for optimal performance and user satisfaction.
7.2 Ensuring Proper System Functionality
Confirm the thermostat integrates seamlessly with your HVAC system by testing each mode, including heat, cool, and auto. Verify that stage transitions, geothermal settings, and dual-fuel systems operate correctly. Ensure communication between the thermostat and remote sensors is stable. Check for proper power cycling and system responses to temperature changes, ensuring all features function as intended for reliable performance and efficiency.
Troubleshooting Common Issues
Identify and resolve common installation errors, such as wiring mismatches or connectivity problems. Verify terminal connections and ensure power cycling is avoided to prevent system damage.
8.1 Diagnosing Installation Errors
Begin by reviewing the wiring connections to ensure all terminals match the system requirements. Check for loose wires and verify the power supply. If issues persist, consult the error codes displayed on the thermostat to identify specific problems. Use the manual’s troubleshooting section to address each error systematically, ensuring proper functionality and safety.
8.2 Resolving Wiring and Connectivity Problems
Ensure all wires are securely connected to the correct terminals, referencing the terminal letters and their functions. If issues arise, disconnect power and double-check connections. Verify compatibility with the HVAC system and ensure no wires are damaged. Use the manual’s wiring diagrams to confirm proper setup and resolve connectivity issues effectively, ensuring the thermostat operates smoothly with the heating and cooling system.
Maintenance and Upkeep
Regularly clean the thermostat and check battery levels to ensure optimal performance. Inspect wires for damage and update software periodically to maintain functionality and system efficiency.
9.1 Regular Maintenance Tips
Regular maintenance ensures optimal performance of the Honeywell VisionPro 8000. Clean the thermostat screen and internal components periodically. Check battery levels and replace them as needed. Inspect wires for damage or wear. Update software and firmware to the latest versions for enhanced functionality. Schedule professional checks annually to maintain system efficiency and reliability. Ensure proper thermostat mounting and alignment for accurate temperature readings.
9.2 Updating Software and Firmware
Regular software and firmware updates are crucial for optimal performance. Use a PC with the latest Honeywell tools (v1.16 or higher) to download updates. Connect the thermostat to your computer, launch the software, and follow on-screen instructions. Ensure the device is powered and not interrupted during updates. After completion, restart the system to apply changes. Always back up configurations before proceeding with updates.

Compliance and Safety Standards
Ensure installation meets local building codes and safety regulations. Follow guidelines to prevent hazardous conditions. The thermostat must be installed by qualified personnel adhering to all safety standards.
10.1 Adhering to Local Building Codes
Compliance with local building codes is crucial during installation. The thermostat must meet regional regulations, including electrical and safety standards. Ensure all connections and placements align with specified guidelines to avoid violations. Proper adherence guarantees system safety and functionality, as outlined in the manual. Always verify local requirements before proceeding with installation. This ensures full compliance and optimal performance.
10.2 Ensuring Compliance with Safety Regulations
Adhering to safety regulations is vital for a secure installation. Disconnect power before starting and follow all precautions to prevent hazards. Use appropriate tools and ensure proper grounding. The manual emphasizes compliance with industry standards to safeguard both the system and installer. Regular inspections and adherence to guidelines minimize risks, ensuring a safe and reliable setup. Always prioritize safety protocols during the process.
Complete the installation by verifying all connections and settings. Ensure the system operates smoothly and safely. Final checks confirm proper functionality, providing reliable performance and user satisfaction.
11.1 Final Inspection of the Installation
Conduct a thorough inspection to ensure all components are correctly installed and securely connected. Verify wiring accuracy, thermostat mounting, and system compatibility. Check for any loose connections or damage. Test the thermostat’s operation and ensure it responds correctly to temperature adjustments. Confirm compliance with safety standards and building codes to ensure reliable and safe operation.
11.2 Ensuring User Satisfaction and System Performance
After installation, verify that the thermostat operates smoothly, maintaining desired temperatures and responding to user inputs. Ensure the system integrates seamlessly with existing heating and cooling equipment. Provide clear instructions to the user for optimal usage, including scheduling and energy-saving features. Confirm that all advanced settings align with the user’s preferences to maximize comfort and efficiency. Ensure system performance meets expectations for long-term satisfaction.